What is Home Switch?
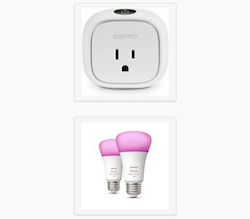
ColorNet Home Switch is an application for controlling smart switches (currently Belkin WeMo) and smart lights (currenly Phillips Hue) from a computer, either via a web page or the command line.
There are two ways of installing and using HomeSwitch: Using the provided install script on a Raspberry Pi, or manually on other platforms.
Home Switch will provide the ability to control smart switches and lights from a computer without any connection to the public Internet, or any account on a third party service (e.g., Belkin or Phillips), as long as it is connected to the same WiFi network as those devices.
So Why Use Home Switch?
Good question! You can control these devices with apps on your phone, and from smart speakers (e.g., Alexa). The intent of Home Switch is more for the DYI crowd, and those who want to control their home devices through programs and scripts separate from glossy end-user applications.
In addition -- as already mentioned -- Home Switch allows you to control devices without an active Internet connection, or having an account on a web site in the cloud. It runs completely stand-alone.
Finally, perhaps partly because of this last point, personal experience has found the programs behind Home Switch to be much more reliable than phone or web apps (the WeMo app in particular), and tend not to suffer from previously configured devices disappearing or becoming unavailable or unresponsive from time to time.
However, if you don't know what a command line interface is, or how to find one on your computer, then Home Switch is not for you.
But you have a Raspberry Pi, or are thinking of getting one, or you just enjoy doing simple programming with shell commands, maybe a bit of PERL here or Python there, and want an easy way to control switches and lights on your network, then Home Switch is for you.
What About a Raspberry Pi?
Home Switch should run on most modern computers with PERL and a WiFi connection. At this time, given the popularity and low cost of the Raspyberry Pi, the install script will only run as-is on a Raspberry Pi running the Raspberry Pi OS. It has been tested to run on fresh installs of the current (Bookworm / Debian 12) and legacy (Bullseye / 11) versions of the Raspberry Pi OS.
Expanding compatibiity of the install script to other operating systems and platforms is planned, but there is currently no schedule available. At lot of it depends on acccess that the author has to different hardware and software platforms.
Nonetheless, for installing Home Switch on a different platform, instructions for a manual installation are provided below. A manual instruction is not difficult, but requires some knowlege of installing software on the computer, and it's configuration (e.g., where to put web files).
What Capabilies Does Home Switch Provide?
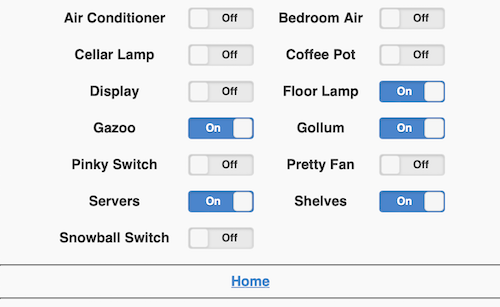
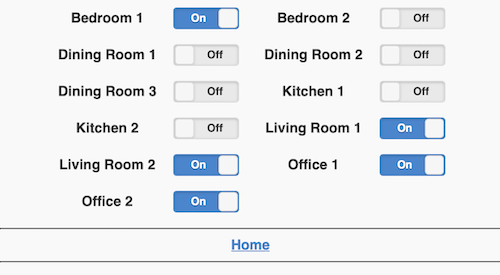
From a web browser on the same network as the computer running Home Switch, the ability to turn switches and lights on and off -- as well as see which ones are curently on -- is provided on a web page, which initially displays icons for both switches and lights (simply click on the one you want to control):
http://10.0.x.:8080/

Controlling Swtiches

Controlling Lights

The same capabilities, and more, are available from the command line:
HomeSwitch install - Install HomeSwitch commands & web site
HomeSwitch switch discover - Search the network for WeMo switches
HomeSwitch switch list - List all discovered WeMo switches
HomeSwitch switch [on|off] {switch} - Turn a WeMo switch on or off
HomeSwitch switch status {switch} - Display the status of a WeMo switch
HomeSwitch light list - List all configured Hue lights
HomeSwitch light [on|off] {light} - Turn a Hue light on or off
HomeSwitch light set {light} {property} - Set a property for a Hue light (e.g., color)
HomeSwitch light status {light} - Display the status of a Hue light
For example, the ability to set light attributes, such as color and percentage of brightness, are available:
$ HomeSwitch light on "office 2"
office 2 is On
$ HomeSwitch light set "office 2" 50%
$ HomeSwitch light set "office 2" red
$ HomeSwitch light list
...
Office 2 is on @ 50% RED
...
Installing Home Switch on a Raspberry Pi
For installing Home Switch on a computer using the automated install script (currently supports Raspberry Pi):
- Download Home Switch (either tar or zip)
- Unpack the Archive
$ tar xvf homeswitch-1.0.0.tar

or

$ unzip homeswitch-1.0.0.zip
- Use the install command:
$ ./HomeSwitch install
*** Home Switch Web Site & Command Line ***

  Install WeMo Switch and Hue Smart Light
   Web & Command Line on a Raspberry Pi

Do you want to continue (Y or N): y
During the install, you might see the following notice:
NOTE: You may need to logout and back in before performing command line operations

[Hit Return to Continue]
This is normal, because the install script will add the current user to the www-data group, so that the Home Switch data files can be shared between the current user and the web server. However, for the current user, this does not take effect until you login again.
You will eventually be prompted:
Do you want to configure for Phillips Hue Smart Lights (Y or N): y
If you are only using Belkin WeMo switches, and do not have any Phllips Hue smart lights, simply anser 'N'o, and you're done.
If you do have Phillips Hue smart lights on your network, answer 'Y'es, which will locate the Hue Bridge, and then prompt for the bridge developer username:
Wed Apr 17 16:24:57 BST 2024 No Hue Bridge IP is currently configured
Wed Apr 17 16:24:57 BST 2024 Searching for Hue Bridge IP ...
Wed Apr 17 16:24:57 BST 2024 Found Hue Bridge IP: 10.0.x.x
Hue Bridge User []:
If you have not already created a developer username for your Hue Bridge, you can do so by following these instructions from Phillips Hue:
https://developers.meethue.com/develop/get-started-2
After you have entered the developer username and installation has completed, you can access the Home Switch application from a web browser (substituting the IP address of your Raspberry Pi): http://10.0.x.x:8080
Manually Installing Home Switch (on a Unix-based platform)
Command Line Only Installation
1. Install some required software:
(I am suggesting using cpanm[inus] vs. regular cpan, because I generally have better results with the former)
(In most instances, you will use apt-get install to install software on Debian, and yum install (or dnf), on RedHat)
Install: cpanminus (Debian) / perl-App-cpanminus (RedHat)
Install: libssl-dev (Debian) / openssl-devel (RedHat)
2. Install the following PERL modules:
$ cpanm --sudo JSON::Parse
$ cpanm --sudo LWP::Protocol::https
$ cpanm --sudo Net::Address::IP::Local
$ cpanm --sudo Net::UPnP::ControlPoint
3. Download, build and install Eric Blue's Belkin WeMo PERL module from GitHub:
(Install git if not already already installed, but is on most distributions)
$ git clone https://github.com/ericblue/Perl-Belkin-WeMo-API
$ cd Perl-Belkin-WeMo-API
$ perl Makefile.PL
$ make
$ sudo make install
3. Create a writable data directory:
$ sudo mkdir -p /var/www/data
$ sudo chgrp `id -g` /var/www/data
$ sudo chmod 775 /var/www/data
4. Install Home Switch commands from the tar / zip archive:
$ sudo cp iris_switch.pl /usr/local/bin
$ sudo cp iris_lights.pl /usr/local/bin
$ sudo cp HomeSwitch /usr/local/bin
5. For Phillips Hue, create a developer username:
Press the button on the Hue Bridge, and then immediately:

$ curl http://10.0.1.54/api -d '{"devicetype":"homeswitch#perl"}'

Which will generate and return a unique username as JSON:

[{"success":{"username":"####################"}}]
6. Save the developer username from the JSON response to a file:
$ echo -e "HUE_BRIDGE_USER\t####################" > /var/www/data/home_switch.conf
7. Test the Home Switch command line interface:
$ HomeSwitch switch list
$ HomeSwitch light list
For a Web Installation (after Command Line Only Installation):
1. Install an Apache Web server
Install: apache2 (Debian) / httpd (RedHat)
2. Install mod_perl
Install: libapache2-mod-perl2 (Debian) / mod_perl (RedHat)
3. Install Apache development:
Install: apache2-dev (Debian) / httpd-devel (RedHat)
Install: libapache2-mod-perl2-dev (Debian) / mod_perl-devel (RedHat)
4. Install the Apache Request PERL module
$ cpanm --sudo Apache2::Request
5. Copy Web Files
(commands assume document root is /var/www/html, but update if necessary)
$ sudo cp *.html /var/www/html

$ sudo mkdir -p /var/www/html/img
$ sudo cp *.jpeg /var/www/html/img

$ sudo mkdir -p /var/www/html/js
$ sudo cp *.js /var/www/html/js

$ sudo mkdir -p /var/www/html/css/images
$ sudo cp *.css /var/www/html/css
$ sudo cp *.gif /var/www/html/css/images

$ sudo mkdir -p /usr/lib/cgi-bin
$ sudo cp *.pl /usr/lib/cgi-bin
6. Create an Apache Virtual Host
Create a file (name ending in .conf) in the Server Root for web sites
- Default /etc/apache2/sites-enabled for Debian
- Default /etc/httpd/sites for RedHat
(use the following as a template, but update if necessary)
Listen 8080
LoadModule apreq_module /lib/apache2/modules/mod_apreq2.so

<VirtualHost *:8080>
        DocumentRoot /var/www/html
        ScriptAlias  /cgi-bin/ /usr/lib/cgi-bin/

        <IfModule dir_module>
                DirectoryIndex  home_switch.html
        </IfModule>

        <Directory "/usr/lib/cgi-bin">
                AllowOverride None
                Options +ExecCGI -MultiViews +SymLinksIfOwnerMatch
                Order allow,deny
                Allow from all
                Require all granted
        </Directory>

        <Location /cgi-bin>
                SetHandler perl-script
                PerlResponseHandler ModPerl::Registry
                PerlOptions +ParseHeaders
                Options +ExecCGI
                Order allow,deny
                Allow from all
        </Location>
</VirtualHost>
7. Restart the Apache Web server
$ sudo apachectl restart
8. You should now be able to access the Home Switch application from a web browser (substituting the IP address of your computer):
http://10.0.x.x:8080
Still To Do
o Update the automated install script for more operating systems / platforms
o Update the web interface to support changing light properties (color and brightness)
o Support other smart devices (e.g., smart switches and lights from other manufacturers)